Saturday, July 14, 2012

Happy Birthday, Belle!

It's been so long since I've posted here that I almost forgot my password! Have no fear, I've been just as crafty as ever. And more busy than normal. Hence, the FIVE SD cards full of pics that haven't been dealt with. Combine that with a laptop that is on its last legs, and well...lots of crafts, just not much evidence!

Somewhere along the way in all the madness of this spring and summer, my little Belle turned 5! And we just met her new kindergarten teacher this afternoon. She's on a year round calendar, so she'll start kindergarten on MONDAY! I just can't seem to wrap my brain around the fact that the 19" baby I brought home from the hospital is now in elementary school. YIKES!

And thanks to a friend and former colleague of mine, we actually have pictures of her birthday party! Hop on over to Furnished Photography and check out Katherine's amazing work...you might have seen her around here before:) She's been taking pics of my babies since Bee was born and for good reason...she's AWESOME!

So...about the party.

We had a Tea Party just for the girls. I forgot to pull out an invitation when Katherine was taking pics so I can't show you one, but I found a cute little saying and printed it on an image of a vintage hanky. Then I mounted the invite on cardstock and wrapped it in a paper doily and tied it with a ribbon...super cute I assure you:)


I spent six months scouring thrift stores, flea markets, and craft fairs to find enough vintage tea cups, saucers, table linens and hankies for everyone. And I scored a load of vintage tea pots, serving trays, doilies, and additional linens during a last minute trip to my husband's grandfather's house. All the doilies except the really brightly colored ones (a Michaels dollar bin find) were made by Belle's great-grandmother who passed away long before she was born. I think Grandma Ollie would more than approve!


My MIL gets the credit for the amazing party tent...she found it in a Big Lots advertisement a couple of weeks before the big day. It's a monster, but so perfect for a family of little girls!


Fabric buntings made from the stash, giant tissue paper flowers, and balloons made it festive.


Play tea sets provided some party entertainment.


An old high school friend of my husband's was my baker...strawberry cupcakes with strawberry icing and strawberries on top, made exactly to the birthday girl's order, were so delicious.


I made Belle's dress and let me tell you...it was quite an ordeal! There are FOUR full yards of fabric on that tiny little child! I wish I could share the pattern link with you, but I originally found it on pinterest and now can't locate where I pinned it...somehow it has disappeared or I've gone crazy. And I've searched and searched the internet to relocate it and can't find it that way either. I don't have access to the paper pattern at the moment, but I will track it down eventually and share it with you. The pattern was actually really easy to follow considering how complicated the final product appears. But, I HATE ruffles. I mean really HATE them and if you can't tell there are 5 of them on that bad boy. UGH! But Belle was positively in love with her dress, so it was all worth it. Kind of like a wedding huh? It's all about the dress:)


Smaller versions of the vintage hanky images made place cards.


Tea pots and cups held flowers from our garden...it was a bit of slim pickings because many of the flowers that matched our color scheme were fading, but our hydrangeas were in full bloom so we were able to make it work without having to buy any flowers...yay!


And a totally strawberry menu...lemonade with fresh strawberry puree, fake strawberry macarons (two Nilla wafers sandwiched with strawberry icing), strawberry cream cheese tea sandwiches, freshly picked strawberries...and I couldn't help throwing in a bowl of blueberries just for variety. They were NOT part of the approved menu, but Belle let it slide:)


She was having too much fun to see a rebel berry in the bunch!


And somehow we managed to make it through the entire party without a single broken cup!


It wasn't very dainty, but even Bee was able to handle her china:)


Belle, of course, rocked the tea pinky!


Colored pencils and some printable paper dolls entertained the girls as the party was winding down.


Tea cups, saucers, and hankies were wiped and tucked into bags and sent home with all our guests.


The memories of Belle's tea party will definitely be treasured for years to come. It was truly unforgettable!


Now let's hope it was enough to get me off the hook for big fancy parties for a few years:) I love you, Belle-a-boo!

Tuesday, March 6, 2012

Wrap It Up in 2012!

This is me asking you to cut me some slack...kay????

I dreamed up this great idea, but unfortunately it didn't hit mybrain until late in February. So...I'm getting a bit of a late start.

Anyway...introducing Wrap It Up in 2012!


My grand plan is try to put the finishing touches on some projects that are lingering in the stash and have been all but forgotten.


It all started when, one evening, I went looking for something to embroider. Did I have a project in mind? Nope! Did I need an embroidery project? Nope! Did I have a plan for what I might do with said embroidery project? Nope! All I had was a desire to do some hand-stitching.

As I began the process of pulling out supplies, I just happened to glance down and see this quilt top lying there...completely neglected. As it had been for months.

It wasn't embroidery, but it was hand-stitching. And I could use my giant quilting hoop, so it would feel like embroidery. And I do have a lovely collection of variegated perle cottons that would be sure to have some complimentary colors. And it would be nice to actually finish something for once.

So...I bundled it up, dug through my stuff to find the thimble (I'm picky about my thimbles and only use the leather coin kind that cost a fortune...it was imperative that I find it because I didn't want to have to pay for another), and scampered to the playroom closet to collect the quilting hoop.

A few hours later, I was happily ensconced in my hand-quilting when the idea of Wrap It Up in 2012 came to me. Why not try to finish up one project every month? It was already late February...and I did pick a MONSTER of a project to begin with, but it was doable. Right????


Ok, so I'm not 100% convinced that I will actually be able to tackle 12 projects this year, but I figure if I don't decided to hand-quilt every one of them then I might stand a chance....maybe!


So, keep your eyes peeled and you might just spot 12 completed projects this year, all pulled from my stash of WIPs. And you might also catch sight of a little Bee who isn't always the most helpful, but is most definitely always cute:)


And PS - this quilt originated from a charm pack that I won in a giveaway (Central Park by Kate Spain) and had no intended recipient, so it's listed in the shop if you're interested.

Friday, March 2, 2012

Dr. Seuss a la Eric Carle

In honor of one of the world's most famous children's book authors, we started our day off on the right foot with green eggs and ham. I wasn't as creative as many of the others moms and teachers out there who actually took the time to make deviled eggs with green filling or fancy little candies that look like green eggs and ham...and definitely not those intricately iced cookies that are simply too gorgeous to eat...nope, I just dropped several drops of green food coloring into our scrambled eggs:) But the girls were thrilled...though Bee did give me several suspicious stares before she actually took a bite!


But then the fun really began! I'm not sure how it ever occured to me to combine the collage style of Eric Carle with the funky landscapes of Dr. Seuss, but alas it did and I had to suffer the consequences:)


An hour of painting patterns on paper...

A floor covered in wet paint all through the middle of the day...try keeping little fingers out of that!


A foray into the scenes of various Seuss books for ideas for horizon lines, trees, grass clumps, etc.


And then a pain-staking session of helping little hands to cut out all the fancy little shapes she had designed...


But, I think the results were worth it...


Don't you???


This "Seuss inspired landscape," as Belle describes it, is bound for the girls' bathroom wall. It was pointed out to me that there are no "decorations" in that room. And that, my friends, is completely unacceptable in Belle's world:)


I hope you have had a chance to celebrate the contributions of Dr. Seuss at some point in your day! Where would the world be without , in the words of Bee, "the Hat Cat?"

Wednesday, February 29, 2012

Mmmmm...Meatballs!

I have been very consciously trying to get back to my menu planning, grocery list keeping days. You know, the ones before you had two crazy kids under foot all day long. Remember those???

It also helps to justify my obsession with tearing recipes out of magazines and leaving them strewn throughout the house, wherever I happened to be reading at the time. It would probably justify this practice even more if I ever actually followed a recipe....but I don't....EVER!


It's not that those recipes don't get to put use...they just don't get followed. They are more of an inspiration. Like my real life pinterest board...all over my house:)


So, to get back to the point, I carried my carefully plotted grocery list into the store today and began to cross things off one by one. [Believe it or not, there was once a time in my life when I was able to organize that grocery list by the departments in the store...produce, cold cases, etc. But that day has passed...oh well!]


Included in that list were all of the ingredients necessary to make meatballs "using" a new recipe I found in the March 2012 issue of Cooking Light. Which in this case, simply meant that I was going to add ricotta cheese to my meatball mixture because the magazine said it would make the meatballs mouth-wateringly moist.


And that's when I saw it...a sale! On lean ground pork! $1.00 a pound! Seriously...a whole pound of ground pork for just a buck! Oh, this meatball making adventure just turned into a expedition! Why make a batch of meatballs for dinner, when I could make 6 batches and freeze them for later use???


And let me tell you...I've made meatballs before. Pork, turkey, lamb, beef, combos, you name it. But these meatballs are so seriously delicious that the 6 batches may not make it to the freezer. YUM!


And, I think you probably saw the homemade marinara mess that Belle and I made this summer. That's some seriously delicious marinara, but it was all in the freezer. So, I bought a jar of Mid's Meatless sauce. I'm not much of a fan of jarred pasta sauces. Typically, I use big cans of tomato sauce and crushed tomatoes and make my own. (You have to save the homemade stuff for really special occassions, 'cause it's a pain to make!) But I had read, in Cooking Light again, that there are some decent brands out there, so I thought I would give it a shot. If I was going to spend half the day making 6 bazillion meatballs then I didn't want to be slow simmering a sauce all day too. And you know what? This sauce is pretty darn good. It's Sicilian style (I won't pretend to know what that means), and relatively thick for a meatless sauce. And it was perfect with these meatballs.


So, recipe...


Inspired by the Italian Meatball Sliders recipe in Cooking Light, March 2012: I've changed the quantities to make enough to freeze for future meals. The directions for tonight's dinner are pretty much straight from the magazine. There is also a great spinach salad recipe with this in the magazine...we had it as well, and it was delish.


Many, Many Meatballs

Makes approximately 50 2-inch meatballs.


Ingredients:

6 shallots - diced

8 cloves garlic - minced

15 oz. container of part skim ricotta

2 cups Panko bread crumbs

1 cup parsley - chopped

2 lbs. lean ground pork

1 lb. ground turkey breast

5 links sweet Italian turkey sausage - casings removed

1/2 tsp. freshly ground pepper

1 tsp. kosher salt

4 eggs


Saute the shallots and garlic until softened. Then combine all ingredients and mix well. Form two inch balls. * See Special Note below* Heat large stainless steel skillet (I'm sure other types of pans would work here, that's just what I used) over medium low heat. Use an oil mister to spray pan. Reserve enough meatballs for dinner tonight. Then, working in batches, brown remaining meatballs on all sides and place on baking sheet. Heat oven to 350 degrees and bake until cooked through, approximately 40 min. Cool completely. Freeze on a clean baking tray, then transfer to freezer containers and return to freezer.


For tonight's dinner - Slightly flatten reserved meatballs. Add to warm pan and cook 3 minutes on each side. Add 1 1/2 cups marinara to pan and cover. Simmer 10 minutes or until cooked through. Serve on warmed slider buns (I used soft wheat dinner rolls from our grocery store bakery). You could top with a slice of fresh mozzarella and some fresh basil leaves too.


Special Note: A friend of mine shared that he always makes his meatballs in the oven. He skips the browning and bakes them on parchment paper. He swears they are crispy and delicious. And I trust him...he's a super cook and baker, so I'd highly recommend you give that method a shot...I know I will be! It will save you tons of time standing at the stove, browning batches of meatballs. You will still want to cook the ones for tonight on the stovetop though so they can simmer in the sauce.

Monday, February 27, 2012

Easter Swap Update

Are you as excited about the Hand-Made Easter Swap as I am??? Look...Bee is demonstrating just how ecstatic I am feeling:)


Just a quick update for our participants. I sent out an email this morning requesting swap info from you...if for some reason you have signed up for the swap and you did not receive that email, please let me know right away. The shipping deadline is going to be March 31, so please send back your responses as soon as possible, so we can all get busy crafting! Thanks so much...and I can't wait to see what you all come up with!

Wednesday, February 15, 2012

Blog Button Semi-Tute and Sponsorship Swap

Have you ever accomplished something and looked back and had absolutely no idea how you did it?
Welcome to my relationship with html:) [For all you non-bloggers, that's the computer code you use to make magic happen on your blog...links and clickables and all that jazz.]

Out in bloggy-land there is a sponsorship swap going on. Basically, it's a way for smallish blogs to help spread some love to other similar smallish blogs. I put your button on my blog, and you put mine on yours. And I really wanted to play along...I mean REALLY!


Unfortunately, that means that you have to be good enough with html to make that whole button and grab box thing happen. HA! With the help of a new bloggy-friend, Rachael (that's her over there on the sidebar at Imagine Gnats, so go say hi!), I managed to get the crazy thing functional. But, I have no idea how I did it! NONE! Really!


But, I'm quite certain that I'm not the only html-hating bloggy gal (or guy) out there, so I'm gonna try to help y'all!

So for you fellow html-clueless...here's kinda how I did it.


1. You need a square image. I'm a photoshop girl, but for this I highly recommend photobucket. It's just way too simple to make a cute one and get the codes you need. It also cuts out a step because you do the edit right on the host. And if you have no idea what I'm talking about it's ok, I don't either...but, here's what you do.


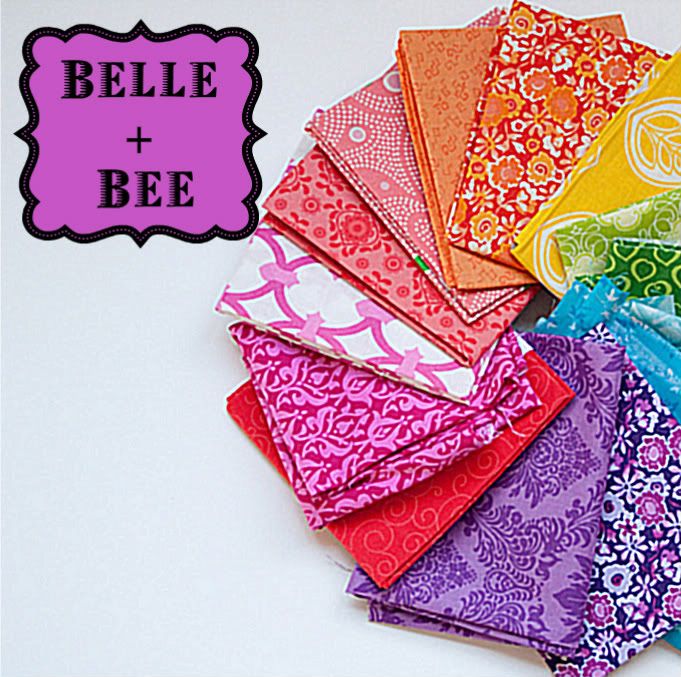
1a. Find a pic of something that relates to the content of your blog. I chose the pic of the fabric rainbow I'm using in Belle's bedroom (that is - yes- STILL unfinished). It is colorful, fun, a decent photo, and hints at the content of my blog.

1b. Upload that pic to photobucket...you will need to create an account if you don't already have one.

1c. Crop that pic to as close to square as you can. Then be sure to save a copy and work from the squared copy. That preserves your original image so you don't have to upload it again.

1d. Add your text by using the decorating tab. It's super easy and pretty self-explanatory...just click around until you get something you like. You can also play around with the other tabs to make changes...I think I sharpened the image, but that was all...but there are some fun things you can do:)

1e. Save all those edits.


2. So you have your square image...great! I wish I could tell you that was the hard part....but, sorry. No. Now you need some code. I would love to just be able to give you the exact code I used, but I'm pretty sure I messed it up somehow because blogger changed what I typed after I saved it. And unfortunately, I have no idea what I did wrong, what blogger changed, or how to help you use the code that is embedded in my button. So instead, I'm going to tell you how I got to where I am and we will hope that it works for you too! I am completely convinced that the html deities just sit around all day and arbitrarily give you a "WORKS," or "NO WAY LADY!" response depending on their mood or what they had for breakfast. So I really will keep my fingers crossed for you.


2a.Anyway...go into your design tab if you're on blogger...or wherever you make changes to your blog. Open up a text widget...in blogger you click Add a Gadget and select Text from the list.

2b. Then hop over to The Little Hen House and check out the post on button making. There you will find the code that I started with. Go ahead and copy and paste it into your text widget.

2c. Then it's time to make it work. You will need to edit the code you just pasted to include your own links. You will know your blog URL (be sure to include the http:// business). When you need to input the code for your image, photobucket is going to come in really handy. Swing back on over to your image and you will find a little box on the right hand side. Click in the boxes to copy the html code, the img code, or the direct link...depending on what your particular code asks for. There are different codes for different hosts.

2d. Cross your fingers and click save.


3. Now it's time to test it.


3a. Test one...is it there? Yes - Good!

3b. If you click on the pic does it link you back to your blog? Yes - Excellent!

3c. Copy the code from the grab box. Create a new html widget on your sidebar. Paste in the code and save it. Now view your blog. Click on the NEW button...does it link you back to your blog? Yes - SUPERCALIFRAGILISTICEXPEALIDOCIOUS! You did it!


4. Now for those of you who answered NO to one of the above questions...that was me. About 600 times. I actually broke out in a sweat trying to make this thing work. If you're totally stuck, feel free to shoot me an email or leave a comment here and I will try to help...notice I said, "TRY." I really want to help. I do. But, I think I was pretty clear that I have no idea how I actually made mine work, so my assistance will be limited. But, I will try!


Good luck and let me know when you're ready to SWAP!